1.2 Chapter Tree
The Chapter Tree offers your library a way to organize it. All your documents, cards, quizzes, and works revolve around the Chapter Tree and make it easy for you to find your files. In this section, we will cover the most important functions of the Elumity Chapter Tree.

1.2.1 The Chapter Tree Structure
The Chapter Tree is structured with Chapters and Subchapters. If you’re familiar with a Folder structure in most modern operating Systems, it works in a similar fashion, except that the files are linked platform-wide and more easily accessible and searchable. If you’ve chosen to use a pre-made Chapter Specialty Tree, then you should have plenty of Chapters and Subchapters to start with.

1.2.2 The Library Name or Root Chapter
The Root Chapter also called the Library Name, is the main name of your study specialty. You can change the name of your Library at any time, by clicking the three-dot menu on the left side of it and choosing “Rename”.

If you choose to use one of the Predefined Specialty Chapter Trees, then you’ll already have a name associated with your Library.
1.2.3 Creating a new Library
If you have multiple topics you're researching from different fields, or you just want to keep your library even more organized, Elumity allows you to create additional Libraries. Simply click on the three-dot menu next to your Library name and select "+ Add Library". This allows you to create a new, unmodified library.

You can then easily switch between your Libraries using the dropdown menu to the left of your Library name.
1.2.4 Creating chapters and subchapters
Organizing is key to the continuation of research and development, so creating new Chapters and Subchapters as needed is absolutely essential.

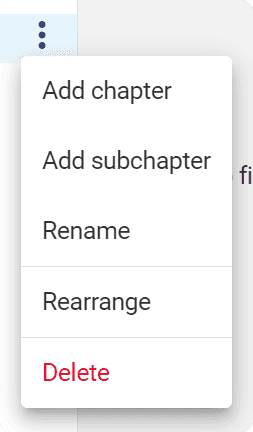
In order to create a new chapter, click on the “+ Add Chapter” field at the end of your chapter tree. This will prompt you to type in your new Chapter name and once you’re done, hitting Enter or clicking to the side will create your new chapter. If you wish to create a chapter underneath another chapter, use the three-dot menu next to the chapter you wish to create a chapter underneath. This way you can also create subchapters.

In order to create a subchapter, hover over the chapter you wish to create a subchapter in and click on the three-dot menu. From there on, select “Add Subchapter” and write out the name of the Subchapter. It will automatically be created a level below the Chapter you selected at.
1.2.5 Moving/Rearranging Chapters and Subchapters
In order to move chapters around, click on the three-dot menu on any of the chapters or subchapters and select “Rearrange”.

At that point, the Chapter Tree view will slightly change and provide handles for you to grab with your mouse and move the chapter up or down your Chapter Tree.

Once you let go of a chapter, the Chapter Position editor will automatically exit. If you’ve accidentally started the editor, don’t worry, you can exit the Chapter Position Editor by clicking on the three-dot menu again and deselecting the "Rearrange" option.

1.2.6 Renaming and Deleting Chapters and Subchapters
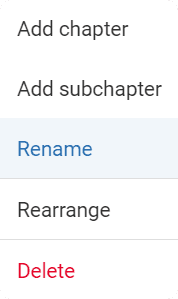
Renaming a chapter is one of the bare essentials of how to use Chapters and Subchapters.
Start by clicking on the three-dot menu on the Chapter you’d like to rename. Once it’s open, you’ll notice the “Rename” menu item. Selecting it will open the Chapter menu editor and you’ll be able to edit the menu name. Save your edited name by either hitting Enter or by clicking somewhere else in the platform.
In order to delete a chapter or subchapter, you’ll have to repeat similar steps as with renaming.
Identify the chapter or subchapter you’d like to delete, click on the three-dot menu, and select “Delete”.

Please be cautious about this process though, because you can not recover deleted chapters and subchapters.
1.2.7 Searching through chapters
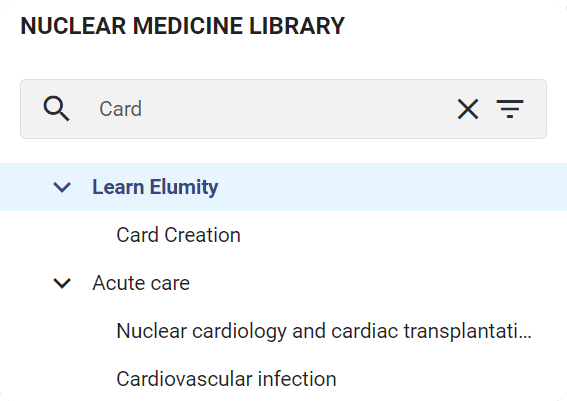
In order for you to search through your chapter tree, utilize the Search bar positioned directly underneath your Root Chapter Name, or above your Chapter Tree.

By entering your search term inside, it will filter all the chapters that are a direct match with your search.

If your search includes subchapters, it will also show its root chapter in the search, highlighting the subchapter matching your search.
In order to change the view options, you can use the filter menu inside the Chapter Search Bar. Choose between showing the chapter in Parent + Child configuration, showing only the chapter matching the search, or showing the entire chapter tree, with your searched-for chapter selected in Bold.
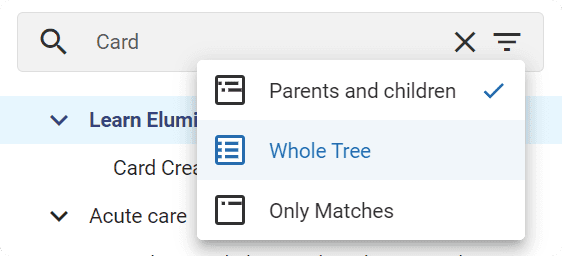
To end your search, simply delete your search term or use the cross next to the filtering options.
1.2.8 Hiding the Chapter Tree Sidebar
In order to hide the Chapter tree sidebar, use the Arrow button at the bottom of the chapter tree sidebar.
The arrow will be visible at all times so that you can bring back the chapter tree and hide it as you need.